
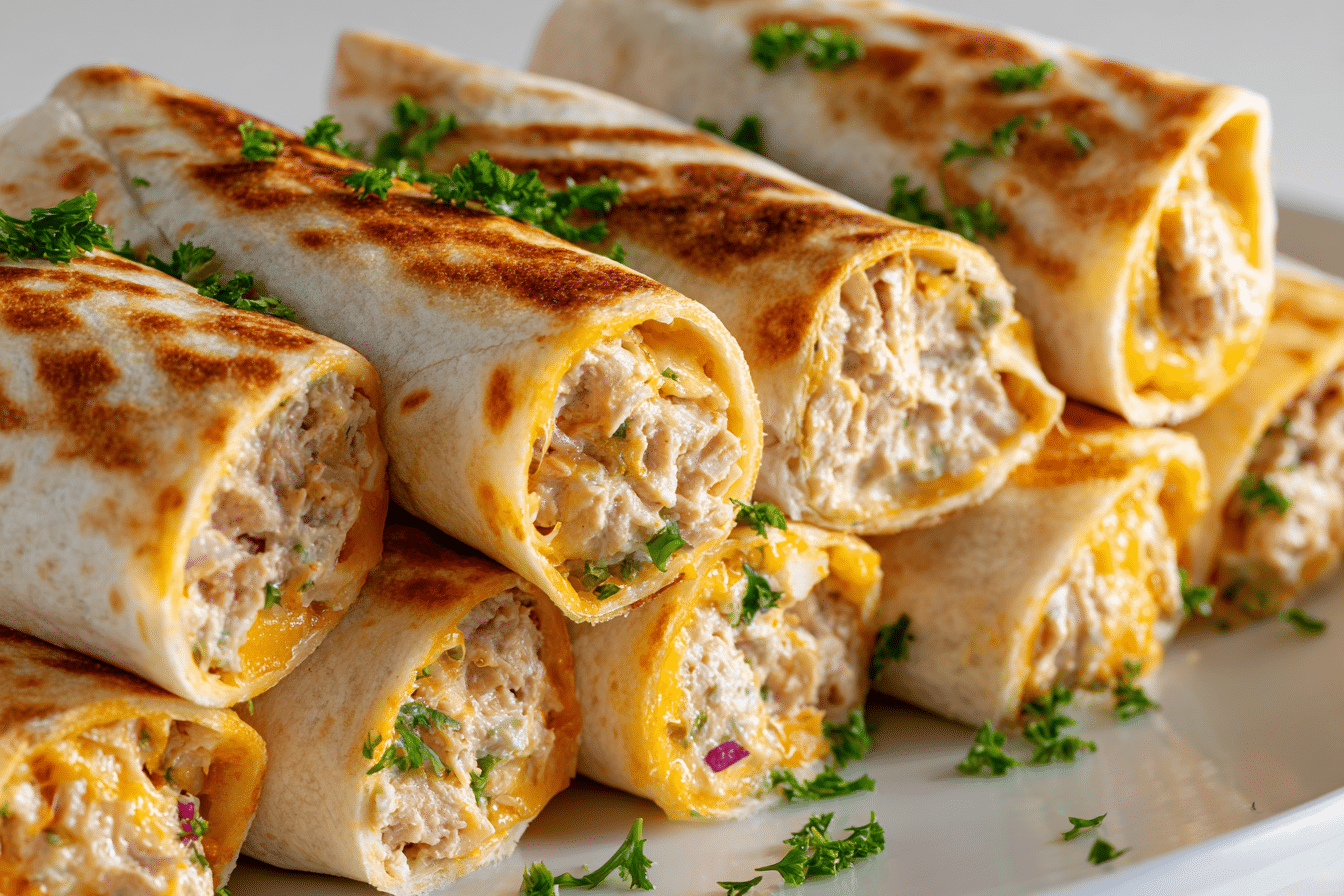
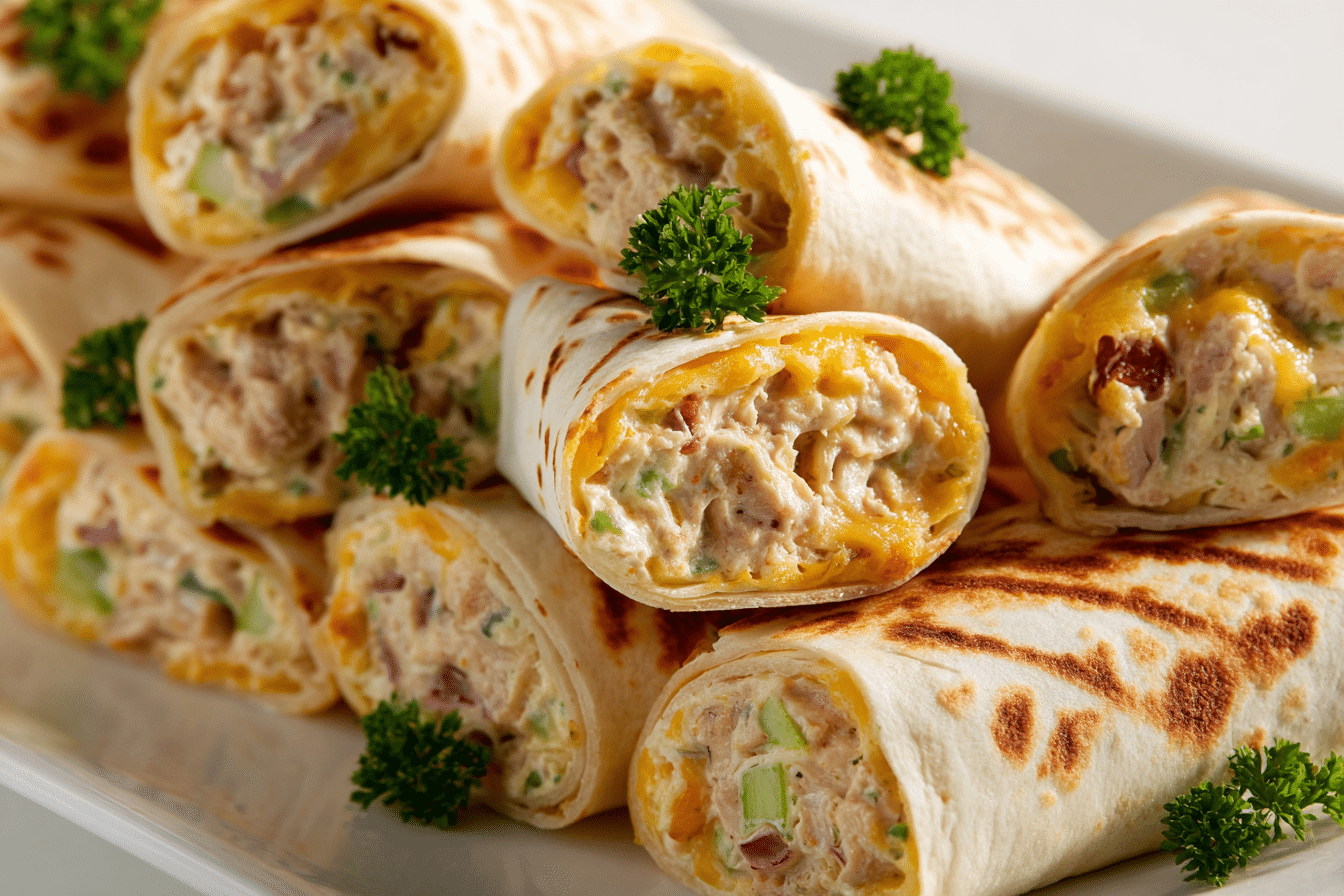
The Tuna Melt Wrap is a modern spin on the classic diner-style tuna melt — a dish that combines creamy tuna salad with melted cheese, often served on grilled bread. This version trades the traditional bread for a soft tortilla, turning it into a hand-held, crispy, melty wrap that’s perfect for lunch or a quick dinner.
This wrap delivers that comforting contrast between warm, gooey cheddar and the cool, savory tang of tuna salad. It’s satisfying, quick to prepare, and endlessly adaptable. Whether you’re using pantry staples or jazzing it up with fresh herbs and pickles, a Tuna Melt Wrap is always a win. Perfectly crisped in a skillet or on a panini press, this wrap is the kind of meal that disappears as quickly as it comes together.
Ingredients Overview
Every component of a Tuna Melt Wrap serves a purpose — from the creaminess of the filling to the golden crunch on the outside. Here’s a look at the essential ingredients and how they work together:
-
Canned Tuna: Choose solid white albacore in water for a cleaner taste and firmer texture. It flakes well and absorbs the dressing beautifully. Oil-packed tuna can also be used for a richer flavor, but be sure to drain it thoroughly.
-
Mayonnaise: This is the base for the tuna salad. It binds everything together and adds creaminess. For a lighter option, you can swap in Greek yogurt or use half mayo, half yogurt.
-
Celery & Red Onion: Finely diced for crunch and sharpness. These vegetables add texture contrast and brightness to the filling. You can also add dill pickles or capers for a briny kick.
-
Dijon Mustard: A little goes a long way in adding tang and depth to the tuna mixture.
-
Shredded Cheddar Cheese: Sharp cheddar is the go-to for its meltability and bold flavor. Monterey Jack or Swiss cheese also work well, depending on your taste.
-
Flour Tortillas: Large burrito-sized tortillas are ideal for wrapping and toasting. Make sure they’re pliable to prevent tearing during assembly.
-
Butter or Olive Oil: For crisping the outside of the wrap to a golden, crunchy finish. Butter gives a richer flavor; olive oil is great if you want a lighter result.
Optional Add-ins:
-
Chopped dill, parsley, or green onions for freshness.
-
A splash of lemon juice to brighten the tuna mix.
-
Sliced tomatoes or avocado for a heartier, veggie-packed version.
Step-by-Step Instructions
-
Prepare the Tuna Salad
In a medium bowl, combine drained tuna, mayonnaise, Dijon mustard, diced celery, and red onion. Stir until the mixture is well combined but not overly mashed. Add salt and pepper to taste. If using lemon juice or herbs, fold those in now.
-
Assemble the Wraps
Lay out your tortilla on a clean surface. Sprinkle half of the shredded cheddar on the bottom half of the wrap (this creates a melted cheese barrier). Spoon a generous amount of tuna salad over the cheese. Top with the remaining cheddar, then fold the wrap like a burrito — tuck in the sides and roll tightly from the bottom.
-
Crisp the Wrap
Heat a skillet or griddle over medium heat and add a bit of butter or oil. Place the wrap seam-side down in the pan. Cook for 2–3 minutes per side, pressing gently with a spatula to flatten slightly, until golden brown and crispy.
-
Cool and Slice
Let the wrap rest for 1 minute before slicing. This helps prevent the filling from spilling out and allows the cheese to set slightly.
Pro Tips:
-
Don’t overfill the wrap — it can cause it to burst while cooking.
-
Use a nonstick pan or a panini press for the most even browning.
-
Press down lightly with a spatula while cooking to maximize surface contact and crunch.
Tips, Variations & Substitutions
Cooking Tips:
-
Warm your tortillas slightly before assembling to make them more flexible.
-
Double the batch and wrap extras in foil for meal prep — they reheat beautifully in a toaster oven or skillet.
Variations:
-
Spicy Tuna Melt Wrap: Add a dash of hot sauce or chopped jalapeños to the tuna salad.
-
Mediterranean Style: Use feta, olives, and sun-dried tomatoes instead of cheddar.
-
Tex-Mex: Add black beans, corn, and a sprinkle of taco seasoning.
Substitutions:
-
Dairy-Free: Use vegan mayo and dairy-free cheese.
-
Low-Carb: Swap flour tortillas for low-carb or keto-friendly wraps.
-
Gluten-Free: Use gluten-free tortillas or collard green leaves for a fresher, raw-style wrap.
Serving Ideas & Occasions
The Tuna Melt Wrap is versatile enough to serve in a lunchbox or at a casual brunch. Pair it with:
-
A crisp green salad with lemon vinaigrette
-
Sweet potato fries or kettle chips
-
A cup of tomato basil soup for a nostalgic comfort meal
-
Iced tea or sparkling lemonade for a refreshing beverage option
These wraps are great for meal prep, weeknight dinners, or laid-back gatherings with friends. Slice into smaller pieces for party appetizers or game-day snacks.
Nutritional & Health Notes
Tuna is a lean source of protein and omega-3 fatty acids, which support brain and heart health. Using whole grain or low-carb wraps can add fiber while reducing the glycemic load.
You can lighten the recipe by swapping in Greek yogurt for mayo or using reduced-fat cheese. Portion control is easy with wraps, making it a balanced choice even when you’re watching calories. Packed with protein and satisfying fats, one wrap can be a complete meal when paired with a simple side salad or steamed veggies.
FAQs
Q1: Can I make a Tuna Melt Wrap ahead of time?
A1: Yes, you can assemble the wraps and store them in the fridge for up to 24 hours before cooking. To prevent sogginess, consider storing the tuna salad separately and assembling just before toasting.
Q2: How do I keep the wrap from falling apart while cooking?
A2: Use a burrito-style fold (tuck sides in, then roll tightly). Cooking seam-side down first helps seal the wrap. Don’t overfill it — that’s a common cause of breakage.
Q3: What’s the best cheese for a tuna melt?
A3: Sharp cheddar is classic, but feel free to try mozzarella for a milder flavor or pepper jack for a spicy twist. Just ensure it’s a cheese that melts smoothly.
Q4: Can I use fresh tuna instead of canned?
A4: Absolutely. Cook and flake fresh tuna for a more elevated take. Grilled or seared tuna adds a meatier bite and fresher flavor.
Q5: How do I reheat a leftover tuna melt wrap?
A5: Use a skillet or toaster oven to reheat and maintain crispiness. Avoid microwaving, as it can make the wrap soggy and unevenly heated.
Q6: Are tuna melts healthy?
A6: Tuna melts can be part of a healthy meal when made with quality ingredients and smart substitutions. Opt for whole grain wraps, light mayo, and plenty of veggies to balance the richness.
Q7: Can I freeze a Tuna Melt Wrap?
A7: It’s best not to freeze assembled wraps, as the mayo-based tuna salad may separate. Instead, freeze just the tuna filling in an airtight container for up to 2 months and assemble fresh when ready.
Print
A quick, satisfying Tuna Melt Wrap with creamy tuna salad and gooey cheddar, wrapped in a golden-crisp tortilla. Ready in just 15 minutes.
- Prep Time: 10 minutes
- Cook Time: 15 minutes
- Total Time: 25 minutes
- Yield: Serves 4
Ingredients
-
2 (5 oz) cans solid white albacore tuna, drained
-
1/4 cup mayonnaise
-
1 tsp Dijon mustard
-
1/4 cup finely diced red onion
-
1/4 cup finely diced celery
-
Salt and pepper, to taste
-
1 cup shredded sharp cheddar cheese
-
2 large flour tortillas
-
1 tbsp butter or olive oil (for skillet)
Instructions
-
In a bowl, mix tuna, mayonnaise, Dijon mustard, red onion, celery, salt, and pepper.
-
Lay tortillas flat. Sprinkle half the cheese on one side of each. Spoon tuna mix over cheese. Top with remaining cheese.
-
Fold tortillas burrito-style.
-
Heat butter or oil in a skillet over medium heat. Toast wraps seam-side down for 2–3 minutes per side until golden.
-
Let rest for 1 minute before slicing.