
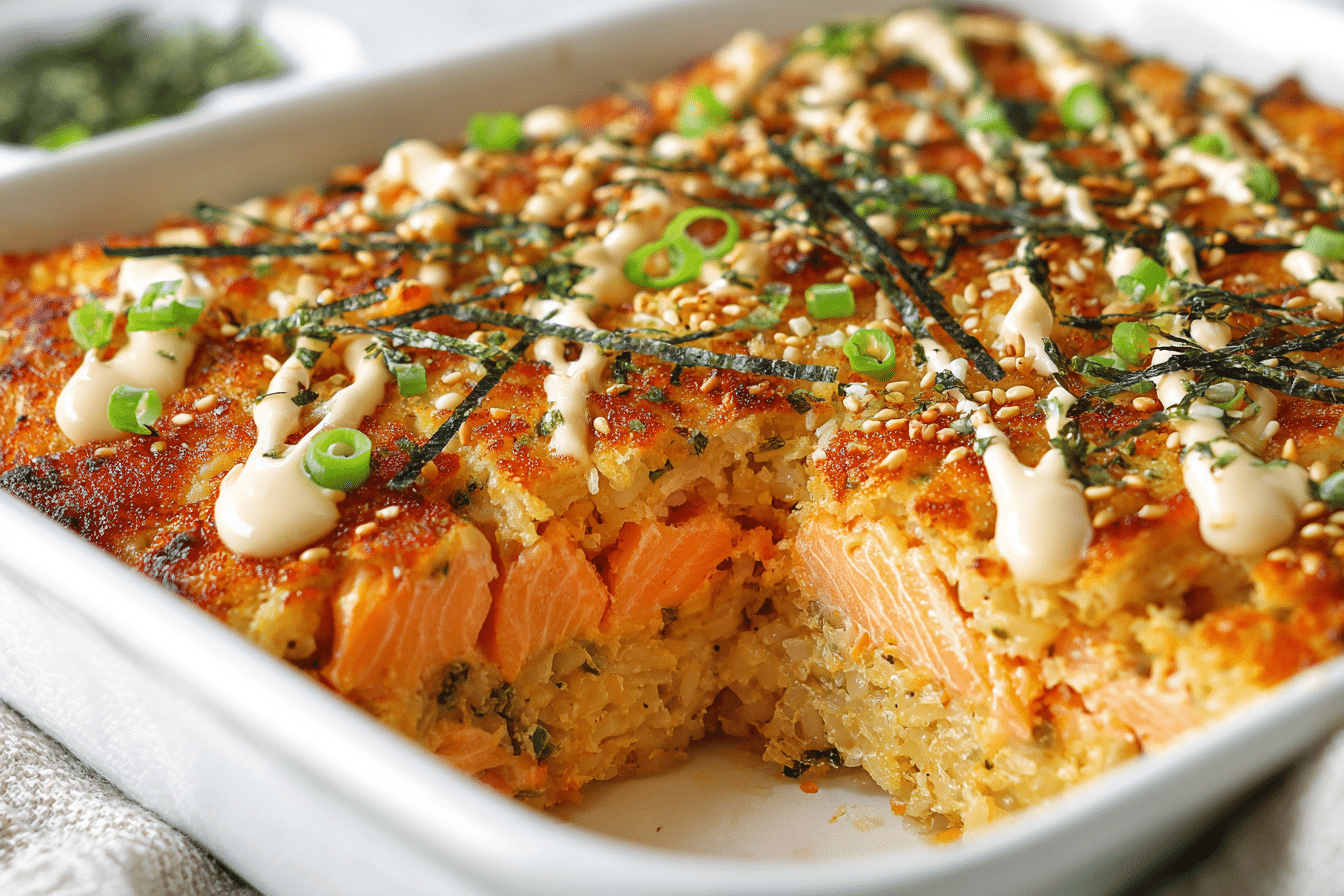
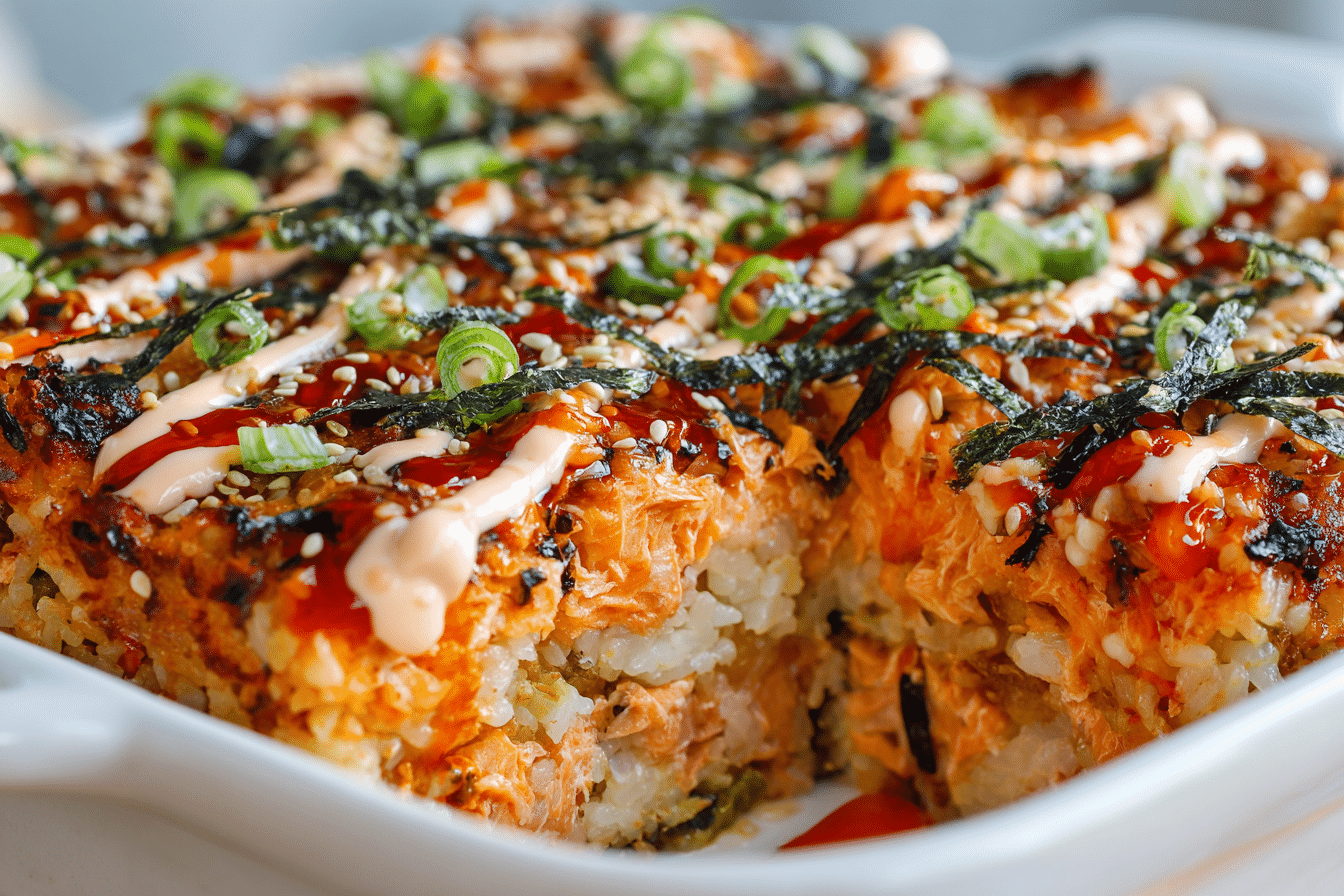
If you love sushi but don’t want to fuss with rolling, this Spicy Salmon Sushi Bake is your new favorite dinner idea. It delivers all the bold, creamy, and umami-rich flavors of a spicy salmon roll — layered and baked into a cozy, casserole-style dish.
Sushi bakes gained popularity in Hawaii and California as a way to enjoy sushi flavors in a warm, shareable format. Instead of rolling individual pieces, the components are assembled in layers and baked until warm and golden, then scooped onto seaweed sheets or eaten straight from the pan.
This version uses cooked or canned salmon, creamy Kewpie mayo, spicy sriracha, tangy rice vinegar, and seasoned sushi rice. It’s incredibly satisfying, slightly spicy, and easy to prepare — perfect for family dinners, potlucks, or casual sushi nights at home.
Ingredients Overview
Salmon (Fresh, Leftover, or Canned)
The beauty of this dish is its flexibility. You can use:
-
Fresh baked salmon: Flaked and tender, this gives the best flavor.
-
Leftover grilled or poached salmon: Great for repurposing dinner.
-
Canned salmon: A budget-friendly and pantry-ready option.
Just be sure to drain canned salmon well and remove bones if needed.
Sushi Rice
Short-grain or medium-grain white rice, like Japanese sushi rice or Calrose, is ideal. It’s sticky enough to hold the base together and absorb the vinegar seasoning.
Season the rice with:
-
Rice vinegar
-
Sugar
-
Salt
This gives it the classic tangy-sweet sushi flavor.
Kewpie Mayonnaise
This Japanese-style mayo is rich, slightly sweet, and creamier than regular mayo. It’s essential for the spicy salmon topping. If unavailable, use regular mayo with a splash of rice vinegar and a pinch of sugar.
Sriracha
Adds that bold, garlicky heat. Adjust to your spice tolerance. You can also mix in gochujang (Korean chili paste) or sambal oelek for a twist.
Cream Cheese (Optional)
For a richer texture, softened cream cheese can be blended into the spicy salmon mixture. It gives a creamy, almost cheesy texture that pairs well with the rice.
Soy Sauce
A touch of soy sauce (or tamari for gluten-free) adds umami and saltiness. Use sparingly in the salmon mixture or drizzle over the top before baking.
Furikake
This Japanese rice seasoning typically includes sesame seeds, nori (seaweed), salt, and dried fish flakes. It adds a delicious savory crunch. Sprinkle it between layers and on top.
Green Onions & Sesame Seeds
Freshly sliced green onions add a pop of color and brightness. Toasted sesame seeds provide nuttiness and texture.
Optional Toppings
-
Avocado slices
-
Pickled ginger
-
Cucumber ribbons
-
Spicy mayo drizzle
-
Extra nori for serving
Step-by-Step Instructions
1. Cook and Season the Rice
Rinse 2 cups of sushi rice until the water runs clear. Cook in a rice cooker or on the stovetop with the appropriate water ratio.
Once cooked, transfer to a large bowl. While warm, gently fold in a mixture of:
-
¼ cup rice vinegar
-
1 tablespoon sugar
-
1 teaspoon salt
Spread the rice into the base of a greased 9×9-inch or 9×13-inch baking dish.
2. Prepare the Spicy Salmon Mixture
In a bowl, combine:
-
2 cups cooked flaked salmon (or 2 cans, drained)
-
⅓ cup Kewpie mayonnaise
-
1–2 tablespoons sriracha (adjust to heat level)
-
1 teaspoon soy sauce
-
Optional: 2 oz softened cream cheese for extra creaminess
Mix until well combined and creamy.
3. Layer the Bake
-
Sprinkle a generous layer of furikake over the rice base.
-
Spread the spicy salmon mixture evenly over the rice.
-
Top with another light layer of furikake, and a drizzle of extra sriracha mayo if desired.
4. Bake
Preheat oven to 375°F (190°C). Bake uncovered for 15–20 minutes, until hot and slightly golden on top. If you want a crispy top, broil for 2–3 minutes at the end.
5. Garnish and Serve
Once out of the oven, let it rest for a few minutes. Garnish with:
-
Sliced green onions
-
Toasted sesame seeds
-
Sliced avocado (optional)
Serve warm with nori squares (seaweed sheets) for scooping, or enjoy it with a spoon.
Tips, Variations & Substitutions
-
Make It Mild: Reduce or omit the sriracha for a family-friendly version.
-
Spicy Tuna Bake: Substitute salmon with canned or cooked tuna.
-
Creamy Crab Sushi Bake: Use imitation crab (kani) or lump crab meat.
-
Low-Carb Version: Use cauliflower rice seasoned with vinegar, sugar, and salt.
-
Gluten-Free: Use tamari instead of soy sauce and check furikake for wheat ingredients.
-
Make Ahead: Assemble ahead and refrigerate until ready to bake (up to 24 hours).
Serving Ideas & Occasions
Spicy Salmon Sushi Bake is perfect for:
-
Family dinners: Easy and filling for everyone.
-
Potlucks or parties: Bake in a disposable tray and serve buffet-style.
-
Sushi nights: Set out with seaweed, pickled ginger, and edamame.
-
Bento box lunches: Great cold or room temperature the next day.
Serve with sides like:
-
Miso soup
-
Seaweed salad
-
Pickled cucumbers
-
Steamed edamame
For drinks, try green tea or sparkling water with yuzu or citrus.
Nutritional & Health Notes
This sushi bake offers a good balance of protein, healthy fats, and carbs. Salmon provides omega-3 fatty acids for heart and brain health, while rice fuels with complex carbohydrates.
Kewpie mayo and cream cheese add richness, so portion control is helpful if you’re watching fat intake. You can lighten it up by using Greek yogurt instead of mayo.
Nori adds iodine and minerals, while furikake contributes seaweed and sesame — both nutrient-rich.
Choose low-sodium soy sauce and serve with plenty of vegetables to keep things balanced.
FAQs
Q1: Can I use raw salmon?
No, this recipe is meant for cooked salmon. If using raw salmon, it must be sushi-grade and thoroughly cooked before mixing into the bake for safety.
Q2: How do I make this dairy-free?
Omit the cream cheese and use a dairy-free mayo alternative. Most Kewpie mayo versions are dairy-free, but check the label.
Q3: Can I use day-old rice?
Yes! Leftover sushi rice or even plain white rice works well. Reheat it slightly and mix with the vinegar seasoning before layering.
Q4: Is this recipe freezer-friendly?
You can freeze the unbaked sushi bake, tightly wrapped, for up to 1 month. Bake straight from frozen, adding 10–15 minutes to the baking time.
Q5: What’s the best type of salmon to use?
Fresh baked salmon offers the best flavor and texture, but canned salmon is totally acceptable. Look for wild-caught, skinless boneless for convenience.
Q6: How do I store leftovers?
Store in an airtight container in the fridge for up to 3 days. Reheat in the oven or microwave with a damp paper towel over the top.
Q7: Can I make individual portions?
Absolutely. Assemble in ramekins or small oven-safe dishes for personal servings — great for meal prep or parties.
Print
A warm, creamy, and spicy sushi bake with layers of seasoned rice, spicy salmon, and furikake. Perfect for sharing, scooping, and satisfying sushi cravings without the roll.
- Prep Time: 10 minutes
- Cook Time: 15 minutes
- Total Time: 25 minutes
- Yield: Serves 4
Ingredients
-
2 cups cooked or canned salmon, flaked
-
2 cups sushi rice
-
¼ cup rice vinegar
-
1 tablespoon sugar
-
1 teaspoon salt
-
⅓ cup Kewpie mayo
-
1–2 tablespoons sriracha
-
1 teaspoon soy sauce
-
2 oz cream cheese (optional)
-
2 tablespoons furikake
-
Sliced green onions, for garnish
-
Toasted sesame seeds, for garnish
-
Nori squares, for serving
Instructions
-
Rinse and cook sushi rice. Mix with vinegar, sugar, and salt while warm.
-
Spread rice into a greased 9×9 or 9×13 baking dish.
-
Mix salmon with mayo, sriracha, soy sauce, and cream cheese.
-
Layer furikake over rice, then top with salmon mixture. Add more furikake and optional spicy mayo.
-
Bake at 375°F for 15–20 minutes. Broil for 2–3 minutes for crispy top.
-
Garnish and serve warm with seaweed sheets.