
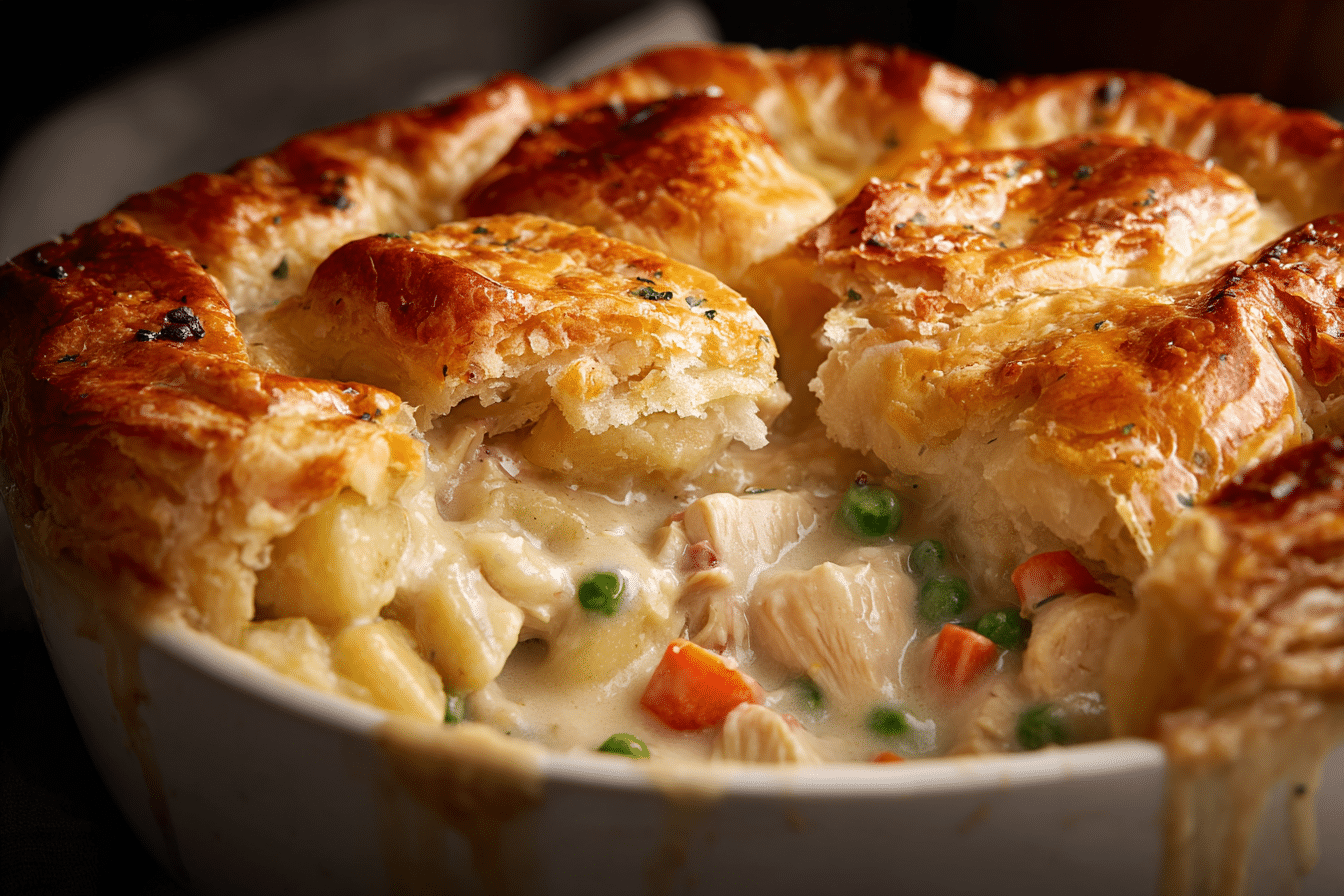
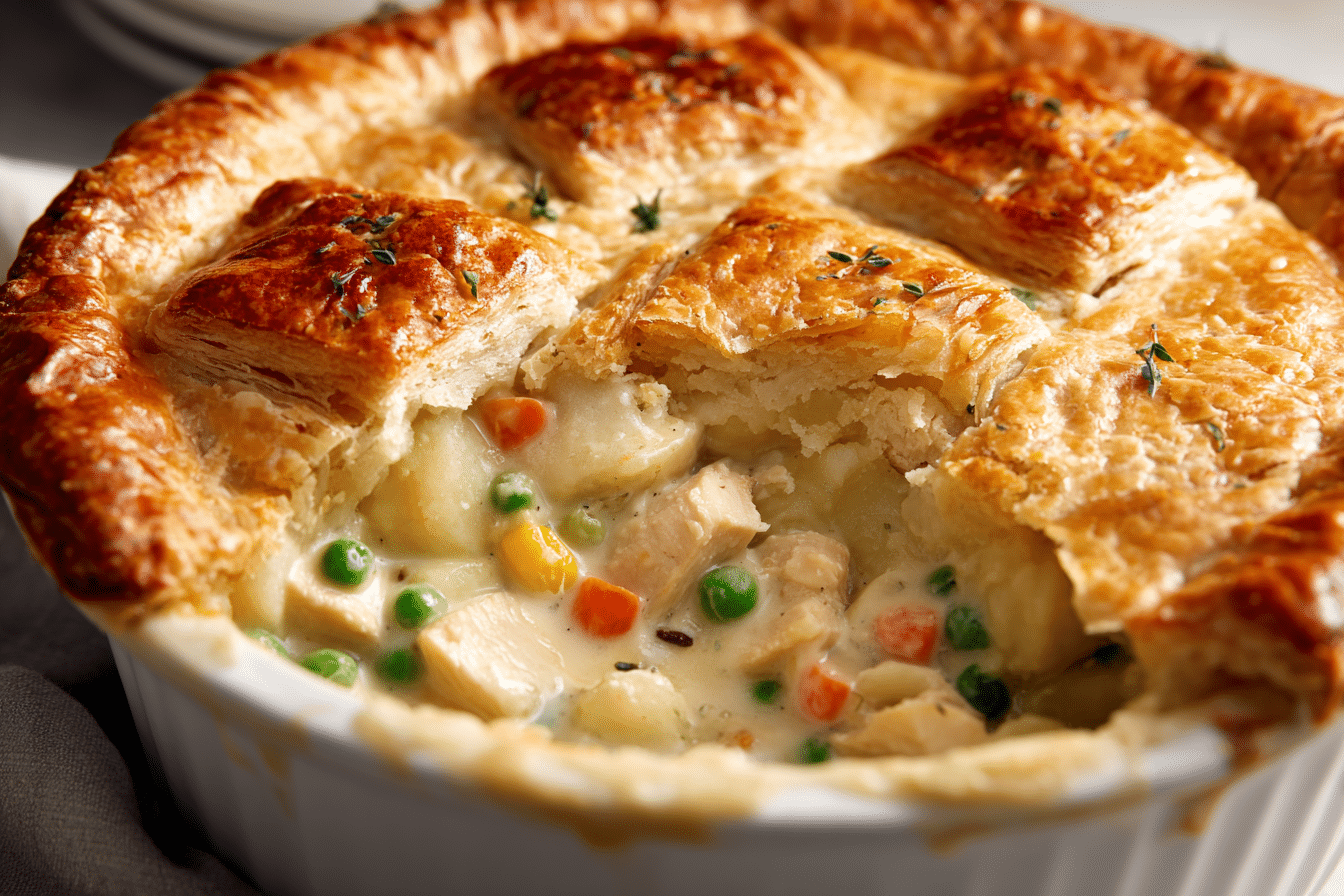
Gluten-Free Chicken Pot Pie is the kind of gluten-free dinner that feels deeply comforting without sacrificing flavor or texture. A creamy chicken and vegetable filling rests beneath a tender, flaky crust that bakes to a beautiful golden finish. Each spoonful delivers savory warmth, balanced by the subtle sweetness of carrots and peas.
This recipe proves that a gluten-free dinner can be just as satisfying as the traditional version. The filling is rich and hearty, while the crust remains delicate yet sturdy enough to hold everything together. With thoughtful ingredient choices and careful preparation, Gluten-Free Chicken Pot Pie becomes a reliable family favorite that no one will guess is made without wheat.
Perfect for cool evenings or relaxed Sunday meals, this dish brings warmth to the table and invites everyone to gather around for a generous serving.
Ingredients Overview
Chicken is the heart of Gluten-Free Chicken Pot Pie. Boneless, skinless chicken breasts or thighs both work well. Thighs offer slightly more richness, while breasts provide a leaner option. Cook and dice or shred the chicken before adding it to the filling. Rotisserie chicken can also be used for convenience, as long as it is certified gluten-free.
The vegetables create texture and depth. Diced carrots add natural sweetness and color. Celery brings a gentle savory note, while peas offer soft bursts of flavor throughout the filling. Finely chopped yellow onion forms the aromatic base. You can also add small diced potatoes for extra heartiness.
Butter forms the base of the creamy sauce. Combined with gluten-free all-purpose flour, it creates a roux that thickens the filling. Choose a high-quality gluten-free flour blend designed for baking and thickening to achieve the best consistency.
Chicken broth adds savory depth. Be sure to select a gluten-free labeled broth. Whole milk or half-and-half enriches the sauce and gives it a smooth, creamy texture.
Salt, black pepper, and dried thyme season the filling. A small pinch of garlic powder adds warmth without overpowering the dish.
For the crust, use a reliable gluten-free pie crust recipe or a pre-made gluten-free pie dough. A blend containing rice flour, potato starch, and tapioca starch typically produces a tender, flaky result. Cold butter or shortening in the crust helps create layers.
An egg wash brushed on top of the crust before baking gives it a beautiful golden color.
Step-by-Step Instructions
Begin by preparing the filling. In a large skillet or saucepan, melt butter over medium heat. Add diced onion, carrots, and celery. Cook for about five to seven minutes, stirring occasionally, until the vegetables begin to soften.
Sprinkle the gluten-free flour over the vegetables and stir constantly for one to two minutes. This step removes any raw flour taste and forms the base of the sauce.
Gradually pour in the chicken broth while stirring to prevent lumps. Once smooth, add the milk or half-and-half. Continue cooking over medium heat, stirring frequently, until the mixture thickens to a creamy consistency.
Add the cooked chicken, peas, salt, pepper, thyme, and garlic powder. Stir well and let the filling simmer gently for a few minutes. Taste and adjust seasoning if needed. Remove from heat and allow the mixture to cool slightly.
Preheat your oven to 400°F (200°C). Roll out the gluten-free pie crust between two sheets of parchment paper to prevent sticking. Carefully transfer it to a pie dish or baking dish.
Pour the chicken filling into the prepared crust, spreading it evenly. If using a top crust, roll it out and place it over the filling. Trim and crimp the edges to seal. Cut a few small slits in the top to allow steam to escape.
Brush the crust lightly with beaten egg for a golden finish.
Bake for 30 to 40 minutes, or until the crust is golden and the filling is bubbling gently at the edges. If the crust begins to brown too quickly, loosely cover it with foil during the final minutes of baking.
Allow the Gluten-Free Chicken Pot Pie to rest for at least 10 to 15 minutes before slicing. This helps the filling set and makes serving easier.
Tips, Variations & Substitutions
For extra flavor, sauté sliced mushrooms along with the other vegetables. They add depth and a subtle earthy note.
If you prefer a dairy-free option, substitute plant-based butter and unsweetened almond or oat milk. Choose a gluten-free flour blend that works well for thickening sauces.
You can make this gluten-free dinner ahead of time by preparing the filling and refrigerating it separately from the crust. Assemble just before baking for best results.
For a lighter version, skip the bottom crust and use only a top crust. This reduces preparation time while still delivering a comforting finish.
Serving Ideas & Occasions
Gluten-Free Chicken Pot Pie works beautifully as a centerpiece for a family dinner. Serve it with a crisp green salad dressed in a simple vinaigrette to balance the richness of the filling.
It is ideal for cooler seasons when warm, hearty meals are especially welcome. This dish also suits gatherings where guests may have dietary restrictions, offering a thoughtful gluten-free dinner option.
Leftovers reheat well and can be enjoyed for lunch the next day, making it practical as well as comforting.
Nutritional & Health Notes
This gluten-free dinner provides protein from chicken and a variety of nutrients from vegetables like carrots and peas. Using a quality gluten-free flour blend allows those with gluten intolerance to enjoy a traditional comfort food safely.
Choosing chicken breast lowers fat content, while thighs offer more flavor. The creamy sauce can be adjusted by using milk instead of half-and-half for a lighter option.
Portion size and balanced sides help maintain a well-rounded meal. Pairing the pot pie with fresh vegetables adds fiber and supports overall nutrition.
FAQs
-
Can I make Gluten-Free Chicken Pot Pie ahead of time?
Yes, you can prepare the filling up to one day in advance and store it in the refrigerator. Assemble with the crust just before baking for the best texture.
-
How do I prevent a soggy bottom crust?
Allow the filling to cool slightly before adding it to the crust. You can also bake the bottom crust for a few minutes before filling to create a barrier.
-
Can I freeze this pot pie?
Yes. Assemble the unbaked pie and wrap it tightly. Freeze for up to two months. Bake directly from frozen, adding additional baking time as needed.
-
What is the best gluten-free flour for the filling?
A gluten-free all-purpose blend designed for thickening works best. Avoid single-ingredient flours, as they may not create the proper texture.
-
Can I use store-bought gluten-free crust?
Yes, many grocery stores carry ready-made gluten-free pie crusts. Check labels to confirm they are certified gluten-free.
-
How do I reheat leftovers?
Reheat slices in a 325°F oven until warmed through. Cover loosely with foil to prevent over-browning.
-
Can I add other vegetables?
Yes, diced potatoes, green beans, or corn can be added to the filling. Keep pieces small so they cook evenly and blend well with the creamy sauce.
Print
Gluten-Free Chicken Pot Pie is a comforting gluten-free dinner featuring tender chicken and vegetables in a creamy sauce topped with a flaky gluten-free crust.
Ingredients
2 cups cooked diced chicken
1 cup diced carrots
1 cup frozen peas
1/2 cup diced celery
1/2 cup diced onion
4 tablespoons butter
1/3 cup gluten-free all-purpose flour
2 cups gluten-free chicken broth
1/2 cup milk
1/2 teaspoon salt
1/2 teaspoon black pepper
1/2 teaspoon dried thyme
1/4 teaspoon garlic powder
1 gluten-free pie crust bottom and top
1 egg beaten for egg wash
Instructions
-
Preheat oven to 400°F.
-
Melt butter in a skillet and sauté onion, carrots, and celery until softened.
-
Stir in gluten-free flour and cook briefly.
-
Gradually add broth and milk, stirring until thickened.
-
Add chicken, peas, and seasonings. Simmer a few minutes.
-
Transfer filling to crust-lined dish and top with second crust. Cut slits and brush with egg.
-
Bake 30 to 40 minutes until golden and bubbling. Rest before serving.