
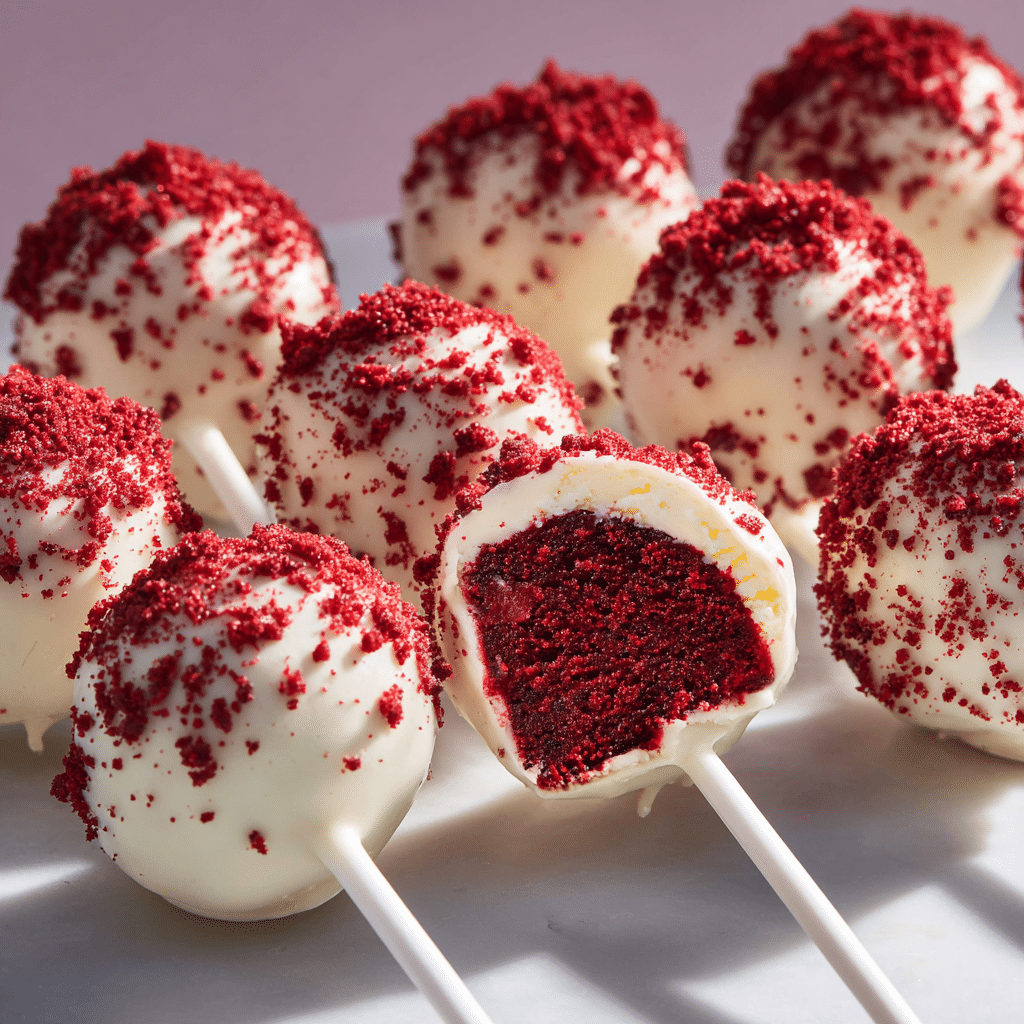
These Red Velvet Cake Pops are the perfect bite-sized treat—moist, chocolatey red velvet cake mixed with cream cheese frosting, rolled into balls, and dipped in a smooth candy coating. Whether you’re making them for holidays, birthday parties, wedding showers, or just because—they’re cute, festive, and totally delicious.
They’re also surprisingly simple to make. You can bake a red velvet cake from scratch or use a boxed mix, making this a flexible recipe for any skill level. Once you’ve shaped and dipped them, they look and taste like something straight from a specialty bakery case.
What Are Cake Pops?
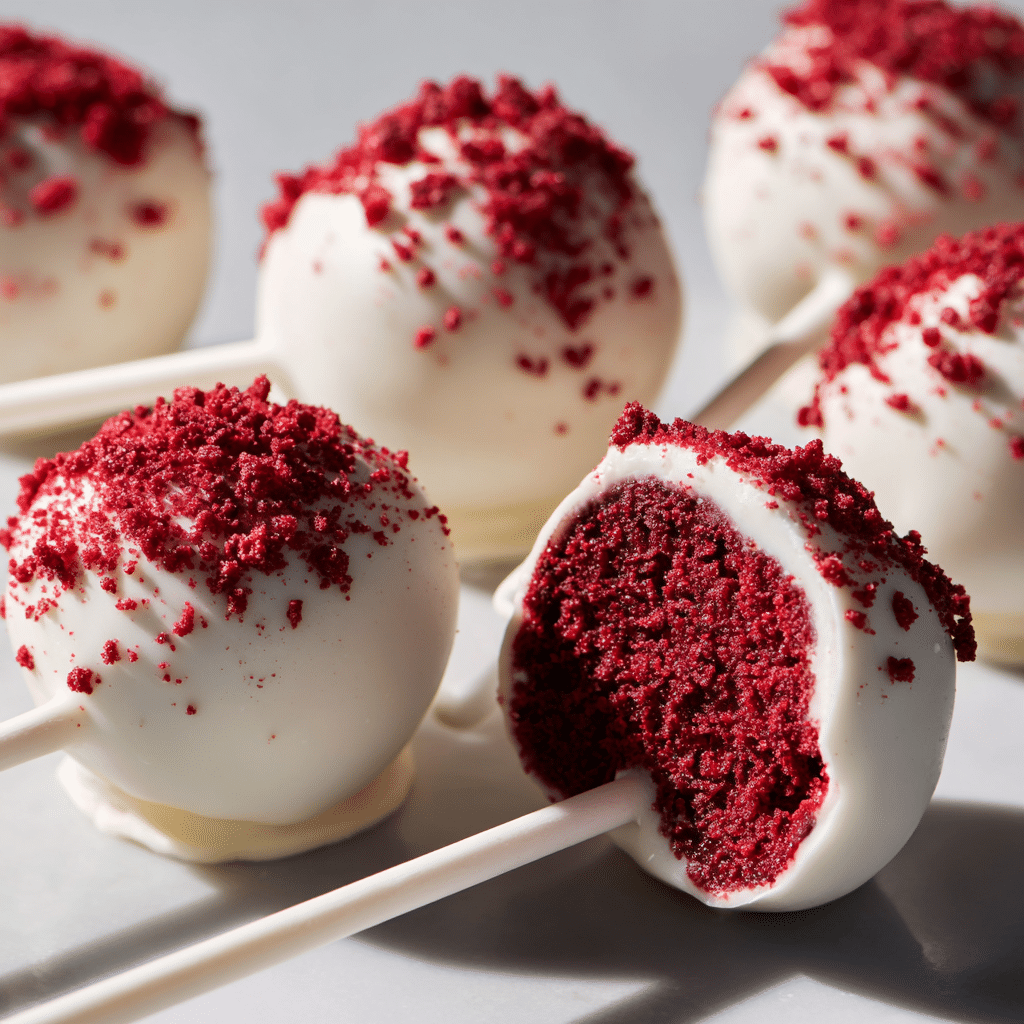
Cake pops are a mix between cake and truffles: crumbled cake mixed with frosting to form soft, rich bites, rolled into balls, then stuck on a lollipop stick and dipped in melted chocolate or candy coating.
Red velvet cake pops are a classic version that’s especially popular around Valentine’s Day, Christmas, and weddings. With their signature red hue and subtle cocoa flavor, they’re a fan favorite.
Ingredients Overview: What You’ll Need & Why
Each ingredient plays a specific role in the texture and flavor of your cake pops.
1. Red Velvet Cake
This is your base. You can make it from scratch, use a boxed mix, or even use leftover cake. Just make sure it’s fully cooled before crumbling.
2. Cream Cheese Frosting
Classic pairing for red velvet. It adds moisture and binding power to help form the cake into sturdy pops. Homemade or store-bought both work.
3. Candy Melts or Almond Bark
Used for dipping. Candy melts are easy to work with and come in various colors. Almond bark or white chocolate also works well.
4. Coconut Oil or Shortening (Optional)
Helps thin the coating for easier dipping and a smoother finish.
5. Lollipop Sticks
Hold the cake balls in place for dipping and serving.
6. Sprinkles or Drizzle (Optional)
Decorate with holiday-themed sprinkles, chocolate drizzle, or edible glitter for a custom look.
Step-by-Step Instructions for Perfect Cake Pops
Step 1: Bake the Cake
Use a 9×13 red velvet cake made from scratch or a box mix. Let it cool completely.
Optional Homemade Red Velvet Cake Ingredients:
-
2½ cups all-purpose flour
-
2 tbsp cocoa powder
-
1 tsp baking soda
-
½ tsp salt
-
½ cup unsalted butter, softened
-
1½ cups granulated sugar
-
2 eggs
-
1 cup buttermilk
-
2 tsp vanilla extract
-
1 tsp white vinegar
-
2 tbsp red food coloring
Bake at 350°F for 30–35 minutes or until a toothpick comes out clean. Cool completely.
Step 2: Crumble the Cake
-
Use clean hands or a food processor to break cake into fine crumbs.
-
Transfer to a large mixing bowl.
Step 3: Mix in Frosting
-
Add ½ to ¾ cup cream cheese frosting to the cake crumbs.
-
Mix until the texture resembles moldable dough. It should hold together but not feel overly wet.
Step 4: Roll Into Balls
-
Use a cookie scoop or tablespoon to portion out even amounts.
-
Roll each scoop into a smooth ball.
-
Place on a baking sheet lined with parchment paper.
-
Chill in the fridge for 1–2 hours or freezer for 30 minutes until firm.
Step 5: Insert Sticks
-
Melt a small amount of candy melts.
-
Dip the tip of each stick into the melted candy, then insert halfway into a cake ball.
-
This helps secure the stick when dipping later.
-
Chill again for 15–30 minutes.
Step 6: Dip and Decorate
-
Melt candy melts in a deep microwave-safe bowl, adding 1 tsp coconut oil or shortening if needed for a smoother texture.
-
Dip each cake pop straight down, then gently tap off excess coating.
-
Immediately add sprinkles or decorations before the coating hardens.
-
Stick into a styrofoam block or cake pop stand to set.
Tips, Variations & Substitutions
Pro Tips
-
Don’t overmix the frosting: Start with ½ cup and add more only if needed.
-
Keep cake pops chilled: Cold pops are less likely to fall apart during dipping.
-
Use a deep, narrow cup or bowl for dipping to get full coverage in one motion.
-
Tap gently to avoid cracking or sliding off the stick.
Variations
-
Valentine’s Day version: Use pink candy melts and heart-shaped sprinkles.
-
Christmas style: Green drizzle over red coating with white snowflake sprinkles.
-
Mini version: Roll into smaller truffle-sized bites and skip the sticks.
-
Chocolate drizzle: Use melted dark chocolate or white chocolate to decorate the coating once set.
Substitutions
-
Frosting: Use vanilla, buttercream, or even chocolate if preferred.
-
Candy coating: Use almond bark, white chocolate chips, or colored candy melts.
-
Vegan option: Use dairy-free cake and frosting recipes, and vegan white chocolate for dipping.
Serving Ideas & Occasions
These Red Velvet Cake Pops are perfect for:
-
Holidays: Valentine’s Day, Christmas, Easter
-
Weddings and Showers: Elegant and customizable
-
Birthday parties: Great for kids and adults
-
Party favors or gifts: Wrap individually in cellophane with ribbon
-
Dessert tables: A colorful and compact treat option
Serve in a cake pop stand, stuck in a decorative foam block, or flat on a platter with sticks up.
Nutritional & Health Notes
Cake pops are a sweet treat, so portion control is key. They’re rich, but also small—making them a satisfying indulgence without overdoing it.
-
Portion control: One cake pop satisfies a sweet craving without a whole slice of cake.
-
Make them smaller: Adjust size to suit your occasion or calorie goals.
-
Lower sugar option: Use a sugar-free cake mix and light frosting.
-
Allergen info: Be mindful of dairy, gluten, and soy content—many components can be swapped for allergen-friendly versions.
Frequently Asked Questions (FAQ)
1. Why do my cake pops fall off the stick?
Usually because they’re too heavy, too warm, or not secured properly. Dip the stick in melted coating before inserting, and keep cake pops well chilled before dipping.
2. How long do cake pops last?
Store them in an airtight container in the fridge for up to 1 week. Or freeze (before dipping) for up to 2 months.
3. Can I use boxed cake mix?
Absolutely. It’s the easiest way to make cake pops quickly. Just bake according to the package and let it cool completely before crumbling.
4. Can I freeze cake pops?
Yes! Freeze undipped cake balls for up to 2 months. Thaw in the fridge overnight, then dip. Fully assembled cake pops can also be frozen, but the coating may crack slightly.
5. Can I make cake pops without candy melts?
You can use melted chocolate or almond bark instead. White chocolate chips work but can be trickier to melt smoothly—add coconut oil to help.
6. How many cake pops does one cake make?
A standard 9×13 cake yields about 36–40 cake pops, depending on size.
7. Do I need a cake pop maker?
Nope! Cake pops made this way (crumbled cake + frosting) are more moist and rich than those from a cake pop machine, which bakes the cake in balls and tends to be drier.
Red Velvet Cake Pops: Bakery-Style Treats at Home

5 Stars 4 Stars 3 Stars 2 Stars 1 Star
No reviews
These Red Velvet Cake Pops are rich, moist, and dipped in a sweet candy coating. They’re perfect for parties, gifts, or festive dessert tables.
- Author: Maya Lawson
- Prep Time: 20 minutes
- Cook Time: 30 minutes
- Total Time: 50 minutes
- Yield: 30-60 servings 1x
Ingredients
-
1 (9×13) red velvet cake (boxed or homemade)
-
½ to ¾ cup cream cheese frosting
-
12 oz candy melts or almond bark (white, red, or pink)
-
1 tsp coconut oil or shortening (optional)
-
Lollipop sticks
-
Sprinkles or decorations (optional)
Instructions
-
Bake cake and cool completely.
-
Crumble into fine crumbs in a large bowl.
-
Mix in frosting, starting with ½ cup. Add more as needed until mixture holds together.
-
Roll into 1-inch balls. Chill for 1–2 hours.
-
Dip lollipop sticks in melted candy, insert halfway into each ball. Chill again.
-
Melt candy melts with optional coconut oil. Dip each cake pop fully. Tap off excess.
-
Decorate immediately with sprinkles. Set upright in foam block to harden.